Work in progress for a collaboration project I am working on with Ted.
3D character modelling done by Ted ( see more of his work here )
Ted and I worked together to create a set of suitable mouth shapes using endomorphs in LightWave. After blocking in the animation for our first test, we worked at refining our target mouthshapes and in our second attempt this is what we came up with:
"A Wizard is never late, Frodo Baggins. Nor is he early.
He arrives precisely when he means to."
After creating a set of rendered images (of the character at each target pose) we ran them through Papagayo and loosely synced mouthshapes to the Audio track.
This is a comparison of our first and second tests. Clearly the mouthshapes are more refined on our second attempt. Major differences between the two are the addition of tongue movement for L and TH sounds, as well as a far more refined shape for F and V.
I also spent some time adjusting the keyframes and tweaking the timing of the dialogue, especially near the beginning of the track. I can see a clear improvement from our first test already!
Future animation tests will include movement of the eyes, lids, brows and head. Our goal is to eventually rig and animate the entire character. This is just the early stages.
Audio track is a short snippet of Gandalf from the Lord of the Rings.
Software used:
Lightwave, Papagayo Mod, scripting with AviSynth and Virtual Dub.

a collection of sketches, animation, illustration, sculpture and other artworks created by me... Matt
Saturday, May 28, 2011

Wednesday, May 25, 2011
2D Lip Sync Test (Girl)
A little test using Papagayo Mod, and some scripting with AviSynth and Virtual Dub.
"You're the best friends anybody ever had!"
Girl character is based upon one of my random sketchbook doodles.
Audio track is a short snippet of Dorothy from the Wizard of Oz.
This video shows the mouthshapes and corresponding frame numbers. This could be particularly useful as reference when keyframing in 3D or planning shots for stop-motion animation. This may in fact replace the need for an x-sheet in table format. Time will tell :)
"You're the best friends anybody ever had!"
Girl character is based upon one of my random sketchbook doodles.
Audio track is a short snippet of Dorothy from the Wizard of Oz.
This video shows the mouthshapes and corresponding frame numbers. This could be particularly useful as reference when keyframing in 3D or planning shots for stop-motion animation. This may in fact replace the need for an x-sheet in table format. Time will tell :)
Sunday, April 17, 2011
"Cat" Corel Painter XI (Test)
Just a quick doodle done using the latest version of Corel Painter XI (trial version).


this cat is blue
and hasn't a clue
what he should do
how about you?
Thursday, April 14, 2011
"Cat" Character Design
Here are some sketches for a character I am working on. I am not sure exactly what I will use him for yet -- they are really just ideas at this stage. But I do think it would be fun to create a short animation with him. Most likely I will create something in 2D, cell or paper-cutout style... but I am also considering the possibility of doing something in 3D.
The purpose of this excercise was really to 'flesh-out' some ideas for what my cat character would like when expressing different emotions. Here is what I came up with:

(click on image to see a larger view)
I sketched these at college using a standard brush (photoshop) set to 4px and flow set to about 20%. This meant I could keep loose and sketch a whole bunch of transparent lines that built up as I went over them again and again -- a little like working with led pencil on paper.
First I sketched a rough head shape and nose that I was happy with. I then duplicated this and used it as an underlay to sketch over the top of. I started by adding eyes, eyebrows and mouths to the blank heads one by one. As I progressed I started adding accesories and playing around with the scale and position of facial features. They got kind of interesting towards the end.
I found it was a great way to flesh out some ideas without commiting to a final design or direction. Oh, and a lot of fun too!
The purpose of this excercise was really to 'flesh-out' some ideas for what my cat character would like when expressing different emotions. Here is what I came up with:

(click on image to see a larger view)
I sketched these at college using a standard brush (photoshop) set to 4px and flow set to about 20%. This meant I could keep loose and sketch a whole bunch of transparent lines that built up as I went over them again and again -- a little like working with led pencil on paper.
First I sketched a rough head shape and nose that I was happy with. I then duplicated this and used it as an underlay to sketch over the top of. I started by adding eyes, eyebrows and mouths to the blank heads one by one. As I progressed I started adding accesories and playing around with the scale and position of facial features. They got kind of interesting towards the end.
I found it was a great way to flesh out some ideas without commiting to a final design or direction. Oh, and a lot of fun too!
Saturday, April 9, 2011
"Chicken" Paint.NET (Test)
Another quick test using some freeware called "Paint.NET"
Unfortunately (for my sketch style) I found the tools to be somewhat limited. The main limitations I had were with the brush tool. Everything else looks to be in order :)

Image drawn using my wacom and Paint.NET (version 3.5.8)
PROS = supports layers (plugin available for export to PSD), supports some blend modes, layer opacity, image and canvas resizing, most tools that you will find in photoshop, most importantly low cost (100% free to use).
CONS = no pressure sensitivity, some keyboard shortcuts vary to PS defaults which can get confusing, no option for soft/hard brushes, no other brush settings available (other than size), no mask layers, no pen tool, not the nicest UI but it is free after all.
At the end of the day, whether or not you get value out of a tool like this depends on what you are trying to achieve, and how you go about reaching your goal. Any piece of software is merely a tool to help you create your artistic vision. There are MANY tools/features in Paint.NET that would be attractive to people who want to edit photos and make transformations and adjustments to colours (Levels, Hue/Saturation, Brightness/Contrast etc). But as for sketching, I found this tool quite restrictive.
Sometimes limited tools can lead to interesting results. If you can learn to adapt to the tools available to you, you may be suprised by what you come up with... I was.
Unfortunately (for my sketch style) I found the tools to be somewhat limited. The main limitations I had were with the brush tool. Everything else looks to be in order :)

Image drawn using my wacom and Paint.NET (version 3.5.8)
PROS = supports layers (plugin available for export to PSD), supports some blend modes, layer opacity, image and canvas resizing, most tools that you will find in photoshop, most importantly low cost (100% free to use).
CONS = no pressure sensitivity, some keyboard shortcuts vary to PS defaults which can get confusing, no option for soft/hard brushes, no other brush settings available (other than size), no mask layers, no pen tool, not the nicest UI but it is free after all.
At the end of the day, whether or not you get value out of a tool like this depends on what you are trying to achieve, and how you go about reaching your goal. Any piece of software is merely a tool to help you create your artistic vision. There are MANY tools/features in Paint.NET that would be attractive to people who want to edit photos and make transformations and adjustments to colours (Levels, Hue/Saturation, Brightness/Contrast etc). But as for sketching, I found this tool quite restrictive.
Sometimes limited tools can lead to interesting results. If you can learn to adapt to the tools available to you, you may be suprised by what you come up with... I was.
Friday, April 8, 2011
"Frog" PS Elements (Test)
I wanted to test out the functionality (and limitations) of PhotoShop Elements for creating coloured digital sketches, so I did this quick sketch of a frog at College the other day using PhotoShop Elements 4.0 (kinda old software now, considering the current version is 9.0) Suprisingly though, it still works ok.

I was pleasantly suprised that many of photoshop's useful painting tools are also present in elements. Including pressure and full support of blend modes. However there were a few limitations that I came across that prevent unrestricted artistic expression. Lack of support for layer masking. Absence of the pen tool. No "flow control" for brushes. Oh, and no layer groups!! Considering the price tag etc PS Elements would perform well for someone wanting to perform basic photo manipulations or do some quick sketching. It has the potential to be a very valuable tool in any artist's digital-toolbox!

I was pleasantly suprised that many of photoshop's useful painting tools are also present in elements. Including pressure and full support of blend modes. However there were a few limitations that I came across that prevent unrestricted artistic expression. Lack of support for layer masking. Absence of the pen tool. No "flow control" for brushes. Oh, and no layer groups!! Considering the price tag etc PS Elements would perform well for someone wanting to perform basic photo manipulations or do some quick sketching. It has the potential to be a very valuable tool in any artist's digital-toolbox!
Tuesday, April 5, 2011
"Rooster Duck" Digital Sketch
Here's an image I drew a while ago.

Digital sketch done in photoshop (using my "Intuos 3" Wacom tablet). He started his life as duck's head in PS, and I decided to give him a Rooster's body. Don't know why, it was just a bit of fun at the time - but I am quite happy with how it turned out in the end.
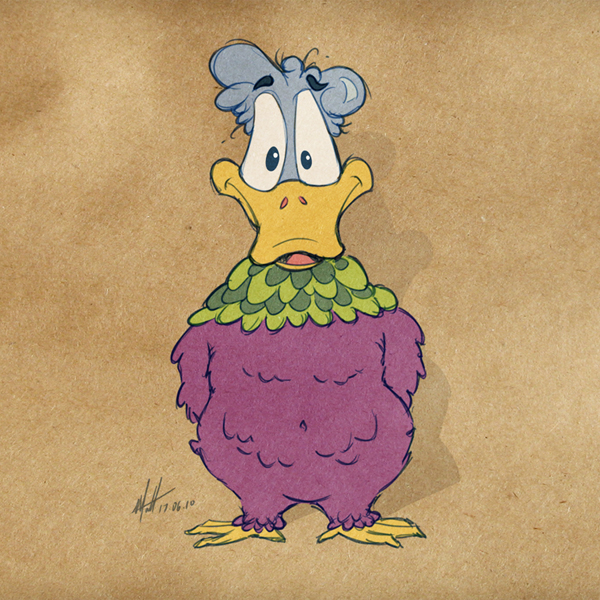
Digital sketch done in photoshop (using my "Intuos 3" Wacom tablet). He started his life as duck's head in PS, and I decided to give him a Rooster's body. Don't know why, it was just a bit of fun at the time - but I am quite happy with how it turned out in the end.
Subscribe to:
Posts (Atom)